44 candles coloring page
candles coloring page

Candle Coloring Pages Download and print these Candle coloring pages for free. Candle coloring pages are a fun way for kids of all ages to develop creativity, focus, motor skills and color … 0

Candles and Cats Magical Coloring Page-Witchy Coloring Sheet-Mystical Coloring Sheet-Digital Printable Coloring Page-Adult Coloring. MysticCrystalShoppe. (31) $1.00. 1
400+ Printable Disney Colouring Pages for Kids | Direct Download | SET 1 Disney Colouring In Book Sheets | Black and White. Hueand. (10) $2.38. $3.40 (30% off) Encanto Coloring pages Digital Download, Coloring pages cartoon. Coloring … 2

Candle Coloring Page For Your Little Ones: Birthday, Christmas, simple, Easter and cupcake with 3
Candle coloring pages to download and print for free 4
Candle coloring pages to download and print for free 5

Three Candle Coloring Pages | Best Place to Color 6

Candle Coloring Page | Colorful candles, Coloring pages, Free coloring sheets 7
Christmas Candle Images - Cliparts.co 8

Candle coloring pages | Coloring pages to download and print 9

Candle Coloring Pages for Kids | Best Place to Color 10

Candle Coloring Page - Ultra Coloring Pages 11
Candle coloring pages to download and print for free 12

Christmas Candle For Holy Night Coloring Pages - Download & Print Online Coloring Pages for Free 13

Candle Coloring Pages For Kids : Best Place to Color | Colorful candles, Coloring pages for kids 14

Candles Coloring Page for Kids - Free Holidays Printable Coloring Pages Online for Kids 15

christmas candle coloring pages | Free Coloring Pages and Activities: Christmas Coloring Pages 16

Simple Christmas Candle Coloring Pages - Download & Print Online Coloring Pages for Free | Color 17
Candle Coloring Sheet - Coloring Home 18
Candle Coloring Sheet - Coloring Home 19
Candle Coloring Pages - Coloring Home 20

Three Candle Coloring Pages | Best Place to Color 21
Candle coloring pages to download and print for free 22

Candles Colouring Pages (page 3) - Coloring Home 23

Church Candles Coloring Pages To Print 24

Three Candle Coloring Pages | Best Place to Color 25

Birthday Candle Coloring Page | Birthday coloring pages, Colorful candles, Cupcake coloring pages 26

Candle On Plate Coloring Pages : Best Place to Color 27
Candle coloring pages to download and print for free 28
Candle Coloring Pages - Coloring Home 29

Coloring Pages Beautiful Candle Holder 30

Candle Coloring Page - Ultra Coloring Pages 31

Christmas Coloring, Candle Free Christmas Coloring Pages: Candle Free Christma… | Free christmas 32

Kid Exam: Cool Candle Cartoon Drawing for Coloring Pages at kid Exam 33
Wind Blowing Coloring Pages at GetColorings.com | Free printable colorings pages to print and color 34
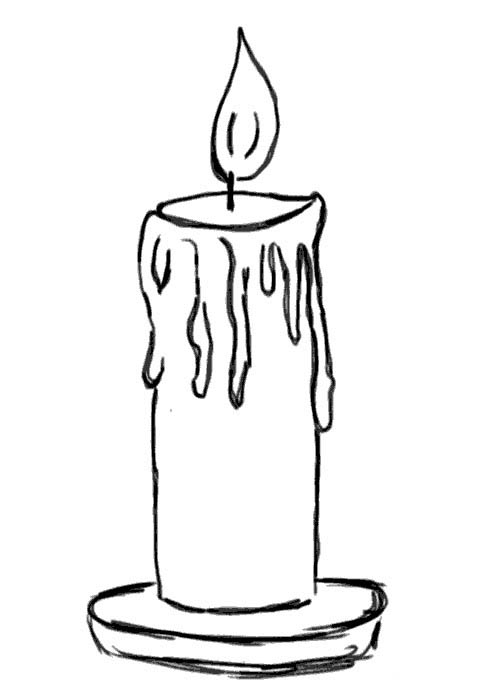
hi everybody it's sarah cray and i teach, watercolor in some time squash and today, we are doing our gouache painting, project titled candle, this is a great project i'm actually, really excited that is a cool project, thank you and we have keenan here, working hello and i know that this seems, um like a lot but i'm telling you it's, so much easier than you're thinking it, is okay you guys got this no problem at, all, you said that what i'm glad you said, that i was stressing well take a breath, because we're going to do this together, and it's going to be great, so our very first step is we are going, to sketch now before you stress out it's, you you can do this i'll walk you, through it um step two we're going to do, our background step three we'll paint, the candlestick portion step four we, will paint the flame portion and step, five we will be doing the bokeh, okay so my goal with this project was to, create like a kind of feeling not only, of a lit up candle in a dark room but, kind of like, the idea that there are multiple lit up, candles far away and that's why we have, this kind of bokeh element where there's, another light source kind of going on, somewhere else but that was a creative, choice on my part which means that you, can change that so if you want to do, this to where there's no bokeh and it's, just a single candle in the room, i will show you how to do that okay, so, um the, paint brushes that i'm using are around, two round six and around twelve i cut my, watercolor paper in half and i taped it, using my holbein soft tape i got a, pencil to do some sketching and i have, five colors for this project, my very first color is ivory black my, second color is permanent magenta nope, primary magenta, my third color is primary cyan my fourth, color is primary yellow and my last, color is permanent white which you, cannot see, white on a white paper, okay, we are going to, do our oath and then we'll start, painting okay okay raise your right hand, and repeat after me i promise to be kind, to myself i promise to be kind to myself, i promise not to compare my work i, promise not to compare my work and i, promise to have fun and i promise to, have fun, thank you, and i love starting that way because, sometimes we approach something with the, idea that we got to be better than, someone else for it to be worth our time, and that's not true my friend it's not, how it works okay okay what glad you, told him, or maybe it's more about, we have to justify the time it takes to, do something and the justification we, find is if it's if we're good at it or, if we can make money off of it but, what i'm hoping that you will find in, this is the justification is the joy in, just creating and that is enough that's, all it needs to be it doesn't need to be, good it doesn't need to be frameworthy, you don't need to sell it you don't even, need to show anybody nobody even needs, to know that you do this, if it makes you happy, make it a priority, okay got it okay all right, i got my pencil, it says i'm an artist which is great, and i'm going to start by sketching my, candle so what we're looking for here is, we are and you can see my paper is dirty, already but i'm going to paint black, over it so i decided just to leave it, and not get a new fresh paper and waste, a sheet i don't need to opaque, gouache is opaque so i can just paint, over it, now and i'm going to look at where i, want my candle to be so you can go off, this reference photo or you can, make your own and i'm just going to, start by drawing two parallel lines that, are, kind of in the center of my painting, and i'm like okay that's pretty thick so, let's, narrow those in, and let's do it about here, and if i'm looking at my reference photo, this is going up not totally halfway but, a little bit halfway okay and you can, see my lines are not straight or perfect, that's not what it's about we're just, kind of laying down our structure, and i'm also not going to erase a lot of, lines because again gouache is going to, cover it, so i have my candle and i have to think, too that this candle doesn't go all the, way to the edge it fades into darkness, so you don't want to make your candle, too short because then you won't have, the, space to do with value change into the, black you know what i'm saying i see, and then when we get to the top we want, to show that it's dimensional so we're, going to have a half circle curve in, this way and it can be a little bit of a, lumpy line because wax melts and then, it's going to come and continue around, the back, so you're doing kind of, this, shape, on the top you see that yep, okay, and then they will have the wick which, is just a line and then the flame and, flames can be really long and skinny and, i really like that look so i'm going to, do that but sometimes flames are just, that you know so like you can decide but, i felt like it was really cool to kind, of do this, long skinny flame, that looks cool, and remember your initial sketch doesn't, have to be the one so let's say that you, do this and you're like oh i actually, don't really, i want this to be, maybe thinner, so, the shape we're doing is essentially, kind of like a teardrop shape where, there's a point at the top and then it, curves at the bottom but we're just, stretching it out like a, like just pretend we're taking that and, going, like a melted teardrop yeah exactly so, it's just going to kind of do that, and, you can see here you can do a bunch of, different sketches to play with it, all of these would work great, because when we do the coloring and the, lights you're going to tell just make, sure it kind of goes to a kind of narrow, point at the top i think that looks, really cool, that, and that and then i'm just going to um, check my widths, okay, and there's different styles of candles, some of them are those like nice wide, round ones some of them are like, really long and skinny if you can do, those like cool age ones where maybe, like the wax is dribbling down you can, do that but we're keeping it simple here, okay i actually think it'd be neat to, make instead of a candle be a like a, skeleton finger, oh that would be cool kind of extra, creepy yeah kind of like you just, do a bone yes, [Laughter], maybe a wand, ooh, you'd be like sparks, that would be cool yeah maybe, again this morning snow lynn martin, lombardi, lombardi's nope the goat nope lombardian, lingotto there you go that's it, i know what you're trying to say, wimbardian, leviosa leviosa, i don't think that's sure it's not, leviosa it's leviosa, oh i remember that scene in the movie, i can't remember the first word though, when barley when god went guardian when, we're moving on but you all know what, we're saying you get it, okay so there's our sketch and um, that feels pretty good now my candle, feels a little bit long in this compared, to my reference photo, so, i'm thinking through, how do i say this, if you're going off a reference photo, and you want your proportions to be, similar to what's happening here let me, show you an easy tool you can use your, fingers as a way to do equal parts so my, candle let's say from the bottom to the, top is this long, that is almost as long as my flame, and, the top is a little bit shorter so then, i can go to my paper and say okay here, is my candle top to bottom, you can tell, that this portion of my candle is longer, in this paper, because here when i compare you can use, a pencil or your fingers when i compare, it to here it doesn't go quite all the, way to the top, it only goes almost to the top this one, goes, all the way to the top, you see what i'm saying yep so then if, you want to adjust it so it's more like, the reference photo then you would just, move it down, and it would just be a little bit it, wouldn't be a lot, but again, that's all up to you, so then we would just move everything, down a little bit, okay, and then you can kind of like check it, but that's just a little tool if you're, going off of reference photo and you're, trying to look at the proportions of the, things and how they relate to each other, and then compare that to your own, painting but it's not like going this, and this does that make sense because, these are two different sized papers, you know it's interesting, how you just described that was starting, to think of different things that would, be like helpful for, me yeah, and so i thought well the way you, described it makes it sound like what if, i divided what i'm doing with the actual, subject, and split the page into three parts, if that would be beneficial visually, yeah, but then i thought what kind of tool, would be useful i thought of a ruler but, that seems so official, i, i mean you can use rulers and and i know, it sounds silly i really struggle with, rulers i don't know why i avoid them at, almost all costs, so i like to use things like my fingers, or the sides of pencils or things like, that it's easier for me and my mind to, make measurements that way than by an, actual ruler but some people really like, rulers and like utilize them well i'm, just not one of those people so, use whatever you feel comfortable using, i will also want to call attention to if, this is centered or not i know that, usually i say try not to have your, subject be the center of your, composition but i felt like for this, project i would want this mostly in the, center, so you can check and just be like okay, is this centered okay it's a little bit, bigger on the right hand side which is, not a huge steel and then you can kind, of check that here's this one and here's, same thing i have a little bit more, space on this side i don't think it, throws anything off, that's fine you just kind of want to, like look at these things all right, okay, i think, now we are ready to, paint, i'm just gonna adjust where my flame, goes, okay, and as you get to painting if you need, to change your mind about, something you absolutely can this is not, set in stone this is a guide, so i'm going to start by doing my, background with my round 12 i'm going to, do a black background except and if you, look at my step by step here, when i get to around the flame i'm going, to do brown, here okay, so let's mix some brown so that's ready, to go, brown is essentially dark orange so i'm, going to take my magenta, and my yellow to make orange, and then i'm going to mix black in there, so now i have a really dark brown and i, want it to be a more, orangey brown so i'm going to mix more, of the red, more of the yellow, and that looks really dark on the screen, but in person it's lighter, i'm going to add more yellow, that feels good that's a good brown, okay, and then for the black we're just gonna, use black, and we're just gonna go, now with gouache, it's opaque but sometimes depending on, how much water is on your brush, you might get, like a lighter value so it's not totally, you see how it's a little transparent, well might not be able to see that on, camera but it's a little bit more, transparent on the top and you'll see, this as this dries, um, you'll see, the unevenness in your lines, as it dries, and if that's happening and you're like, oh i want this to just be pitch black, all you got to do is a couple, layers, that already looks cool, so i'm going to be doing black, essentially, around this whole thing, and i'll even do it like a little bit, here and we'll go more into that when we, actually paint our candle but you can, kind of establish that it does fade into, darkness, hello darkness my old friend, and you can overlap the candle a little, bit if you want because we will be, painting on top of it, and then at this point, well actually let me do i'm going to, want to do the black around the back, part here, okay, and now i am going to grab the brown, that i already mixed, and you can let it overlap with the, kind of black edges here, so try and avoid the flame, that you sketched out, candles are an ancient human pastime, device, ancient, like 500 bc, day, i know well that's how they were able to, do anything, at night right yeah but it's just, candles, candles, okay so i got my brown i got my black, and now i want, the um the brown to be a little bit, stronger, and as you can see my painting is, starting to dry you can see where, there's a lighter like black you see, that right here yes okay so that's just, saying sarah you got to do another layer, um, to make that nice and black on there, but first i'm going to go to my brown, and i i think i'm going to do another, layer and i'm going to lean it more, towards red so i'm going to take some, fresh yellow, and i'm going to take some magenta, and i still have brown on my brush from, when i was laying that color down which, is fine just kind of mixing in there, okay let's see this color, i want it to be, pretty like, vibrant, so if you need to use just like yellow, and red around here that's okay too, just kind of blend it out, and this i just laid down straight, magenta and i'm just kind of working, that into, the colors here, so what we're trying to communicate here, is that a candle, in a dark room, it illuminates the darkness around it so, in order for us to paint that this is, why we're doing a value shift here this, is why and by value shift i mean values, shift by hue so it's going to like, um like a, lighter, black does that make sense but i i, wanted it to be, more colorful and warm than gray does, that make sense you can use gray, like you could do this whole thing where, this area would just be a lighter value, of black and it will communicate, illumination but i wanted to really make, sure that that warmth of the flame was, communicated across everything so i, decided to lean more towards browns and, oranges and yellows, instead of just, white, and, gray does that make sense yep, okay we're gonna just like let that be, for a second okay, and i'm going to move on to doing, another layer of black, and if you can see some brush stroke, that's okay it's not the end of the, world and i actually kind of like that, painterly look of like brush stroke and, texture, but this is your painting, so you can, change it however you need to to, whatever you like, i felt like my left side didn't get as, light in value, i feel pretty good with how, dark it is, maybe a couple strokes just for good, measure, especially making sure you go all the, way to the edge of the paper so you know, you can get that nice clean line, okay, that feels good we're gonna move on to, step, three where we're gonna paint the actual, candlestick itself, and, actually i feel like i need to, straighten this, this is where you're going to kind of, look at the shape it seems like it's, bending a little bit but when i go to, paint it i'll straighten out this edge, you see what i'm saying yep so you can, strain out your candle when you're, actually painting it itself, um, okay so we're going to try and make a, saturated cream that kind of waxy color, so in order to do that i have brown hair, already mixed i'm going to take that, brown and i'm going to add white to it, and then we're just going to see what, color comes up, oh look at that, it's like a wax color oh wow waxy, now if you want it to be warmer i feel, like there's different, like colors of wax you know so you guys, can adjust the color as you see fit i, wanted it to feel very aged and i feel, like age wax has like this, yellowness to it so i'm gonna grab some, yellow and introduce that to my, wax color, that feels better and then you'll notice, here that there is a value shift on my, candle that's how we're showing like, this, light is illuminating the top and then, as it fades away from the light the, darkness is taking over okay so i need, to have a value shift ready to go to mix, so, i want essentially white, for the highlight if you look here i, actually have a i have a white edge on, the bottom part of my candle, and then i go to my actual candle color, itself, and then i want it to fade, into, black, but black is very very strong so you, want to just like like the black i just, introduced here is taking over that, color completely so i need to start a, new pile, and let's add some white to it, i forgot that white one was there, i couldn't even see it till you did, there we go, that feels better and that can mix in, with this, until eventually it's going to go to, nothing okay so this is just like a, starting place for our different values, and then we'll adjust it as we see, fit i'm going to move to my 6, and i'm going to grab this really light, value here, i'm going to start putting that in, and i can see on my reference photo i, have a little bit more warmth so when, you see that you can just pick up more, color, you would need 61 candles, to light up a room, that has, one led light, really so one led light, basically is it's what's 800 lumens that, an led light is and a candle is 13., wow, yeah, okay, so i kind of started with my, lightest value here and i'm kind of like, looking at, how wide my candle is making sure my, edges are nice and sharp, okay, and you might need to do a couple layers, to kind of, overpower that black, i'm going to leave that for a second i'm, going to keep working my way down so i'm, just going to grab from the values that, i've already mixed, and let them overlap the previous color, and kind of work it back and forth, get a new nice smooth blend, and then i'm going to do the next dark, value, work that back and forth, and then i'm going to grab even more, and at this point we want to be like, if not black like so close to black, okay, now this is a good starting point, and this is where you're just like okay, i've essentially established where my, values are going to transition i kind of, have a fade going on and now this is, where it's just like how can i make this, a little bit richer, i feel like i got some vibrancy right, here on this candle do you see that that, spot right there i feel like it's, missing from here, which this is the wonderful thing about, gouache is you let it dry you can do, another layer right on top of it so to, get that vibrancy what i want to do is i, want to mix a light value but avoiding, white because white tends to like, desaturate colors a little bit i feel i, mean i could be crazy but, sometimes if i know that i need just, like a hint of orange, i'm not going to want to bring, white into the, mixture i agree with that because when, you adjust the exposure on a, camera so if you raise the the, brightness, you lose image, depth, so because you also lose, color, so the white overpowers yeah the light, overpowers, and then i'm just doing like a thin, layer of yellow on top to kind of keep, going with that aged look, but remember because opaque because, water, because gouache is opaque it can, overpower the values that we already, established so just remember that as you, work your way down, you want to make sure that you're, adjusting your value, too, and then when i get to the bottom here, it needs to be, more black, i need to put more black on my palette, and if your my candle is still looking a, little bit the shape is a little bit, lost still, but we can tighten that up so it's just, like where do i want my candle edge to, [Music], be how does that feel and then i need to, address, the other side, okay and i feel like it it's widening at, the bottom which i kind of want it to, stay a little bit more, parallel so i'm going to try and, straighten that out, okay, and then, i want to introduce this like pure black, at the bottom, and then blend that into, so i'm just kind of taking the color, that i just laid down, and just kind of working it up into the, candle, then i'm going to rinse my brush, kind of where these two areas mean it's, just going to be a damp brush i don't, have a lot of water on my brush but it's, clean, and you're just going to start kind of, blending this out to try and get smooth, now what's tricky is black is so, powerful that you see it just keeps, working its way up into my candle you, see how it's working its way up when, that happens grab some of the lighter, value, and push it down, so you say, i'm gonna i want you to keep dark down, here actually so i'm gonna just, grab some color, and then work down instead of continuing, to work up does that make sense yes it, does, but it's kind of like a balancing act, and you just have to keep moving working, up and working down and working up and, working down until you feel that it's, smooth, until that transition feels, like oh yeah yeah yeah, that's the ticket there we go, now, this light value that i put in up here, is so light that it actually is shifting, the shape of my candle so i need to go, back in and kind of, darken this edge so that it doesn't look, like, a deep, like you you know what i'm saying, i needed to tighten that edge up, and i'm just kind of blending, okay and i still just really am missing, just a hint of just, warmth, so i'm going to try and put that in, oh there we go that feels better, let's see if i can like, introduce that richness into my, down here, and i know that with these projects we, have been, really working on hue and color and, value transitions a lot and i just want, to say that it feels, sometimes a little exhausting because, you're like oh gosh i put it now i gotta, go this way and this is just the nature, of, creating a smooth transition you're not, doing it wrong by how long it takes you, um, it really just takes patience, like the the harvest moon project, yeah got to get that smooth yeah, transition, and two, also, as you paint, your it's going to dry differently right, i'm going to try and introduce a little, bit of brown to this so i use black a, lot as a way to adjust the, value to make it a darker value but if, that's reading as too gray, let's see what happens if you put a, little bit of brown in there can you get, that kind of hint of a dark value but, with some warmth, okay, and now i'm feeling like this section, here to here is even in value, like if you were to cut off this, and cut off i agree with that, okay so when that happens it's just like, okay i want there to be, more transition you gotta go and put a, value that's in between in there, and if that means making your, your dark colors kind of like, go up a little bit more that's what that, means, okay and now i feel like my black line, is, pretty strong like just horizontally, across, and i want it to fade, a little bit better so i'm going to put, some color in, take some out, man this is a cool project, i mean already, i'm gonna just do some strong color here, yellow red, that feels better yeah, [Music], okay i'm going to let that be just for a, second and i'm going to move to my two, because we got to paint the other side, like the inside of the candlestick, that's, that we see, so what essentially what we're going to, do is we're going to leave a really thin, white ridge here to communicate that's, the front of the candle and then it's, going to go to a really dark value, around the wick and then transition to a, lighter value at the top but our area is, like this big compared to this big so, it's we're not going to be too, too detailed but we absolutely want a, value transition so i'm going to grab, some dark brown that i still have on my, palette, and then right around this wick, remember i'm leaving a thin white line, in between, i start the dark brown, and then i grab, the colors that i already have to, transition, to kind of that yellow creamy color, i'm excited for that background, yeah, and the flame, the flame the flame is one of those, things where, um, just actually a few like little, highlights and hints, is all you need cool, i'm the same way, yeah yeah, and i'm just kind of like looking at the, shape of my candle and adjusting the, edge a little bit, and if you accidentally like paint over, that white edge it's not the end of the, world because we do have a, white, highlight, i'm going to thin mine out because it, just got a little bit too, all right there we go, okay, [Music], and you have to also like, think about, making sure there's black kind of, working its way around, okay i'm going to let that dry for a, second before i go in and do more i need, to basically redo this clean edge like, not redo a clean i need to do this edge, more clean so i need to let this dry for, a second before i go back in and try and, make any more adjustments, and then if you're feeling kind of edgy, and what i like to do is when it's dry, like this, just check to make sure it was dry with, my finger and it mostly is, i really like to mix vibrant colors and, just do like, bold strokes, oh yes, it doesn't have to be a lot but just, enough to be like, pop of color bam, it's funny actually how you put color on, your paintbrush, and then when you actually touch the, paper how little, comes off your paintbrush onto the paper, i always expect it to be more yeah, why is that why why how are you getting, because it looks like you're full on dip, in your paint brush in the paint, and then you put on, well, for the composition an aggressive amount, of paint but for in my brain, it's not that much paint because i'm, touching the paper lightly with my brush, so i'm not like, so i'm not picking up all of this paint, and then just like pressing down really, hard so all that pink gets transferred, i'm picking up a good amount, but then just gently, bringing that to the page okay, where like, if i were to pick up this is going to, mess up my painting but if i'm just like, picking up so much paint and i do this, you see yes, so i'm doing light pressure brush, strokes that's why not a lot of the, paint is being transferred over got it, but that's a great question keenan and, can be really confusing to people who, are like wait a second, so, i'm just gonna transition this out i'm, gonna see her playing the paint over, there, so even just that little hint of color, right there i don't know i just really, love it, but i feel like my black needs to, there we go that feels better and i feel, like see how i have this highlighted, edge right here yeah, i feel like it's actually, messing with the three dimensionality of, my candle, so i'm going to try and match this, medium hue or this medium value, so that edge can continue to go around, and disappear, got it, rather than potentially making okay it's, curving around, if you have a strong how do i say this, when you have a lighter value edge, it, our brain knows that things that are a, highlighted value are what's closest to, us so if the side of a candle that is, turning away from us has a very strong, highlight it edge then the volume that, we're trying to make of trying to create, an illusion of a three-dimensional, object that goes away from us actually, is pulling forward that white edge is, matching its plane with the front of the, candle because of the highlight does, that make sense, so if you notice that you have an edge, on your candle that is a highlight, especially the same value of this, highlight up here then instead of the it, creating the illusion that we're pulling, away it's gonna bring the side of that, candle back up and then all of a sudden, we're like wait is this a square blocky, candle or what is it actually rounding, away from us, so, look at your edges, and look at those values and are they, actually matching, it or is there a little bit of a, highlight that you need to kind of, adjust, okay now i'm a little bit more convinced, that it's fading into darkness, i feel like see how this edge is popping, out though yeah, gotta do something about it hide it, oh that looks cool, and maybe, a little bit more, yeah, now i'm a little bit more convinced, okay, and this part still looks funky that's, okay we're not touching that part yet, we're not there yet we're gonna leave, that beef just for a second and we're, gonna move on to our flame, so, if you look at the reference photo here, of the flame i actually kept the flame, itself white i did not paint that white, that's the white of the paper but if you, look at the very edge of my flame if you, go just around the outline i have yellow, and i have red and i have orange so, you're going to take these very, saturated hues, and that is going to give the impression, of that warmth right there right where, that flame is meeting the air and then, if you look at my wick here i have a, little hint of blue because as you guys, know the really the like source of the, heat that like where it's condensed or, you know fires and stuff like that, there's blue, now where you would want to use white in, this flame is if maybe accidentally you, covered, um you painted over the flame that you, originally drew out when you were, putting in your background so then you, can just like reshape, using your two, and i really like like the thinnest, line up here okay, rinse that out, and now i'm going to grab, yellow, but just, yellow add a little bit of water in, there to make it fluid like make it, easier to brush on, and i'm just going to work, around the flame, so you're kind of going into the white a, little bit so that yellow can really, stand out and you're kind of going into, the brown a little bit, and then i'm going to grab some magenta, mix it with a little bit of yellow so it, turns that like nice red color, and if you want it to be more orange, than red, you can, just mix more yellow in there, but we want it to be, strong in color we want it to be, bold so i'm just putting like nice thick, but, look at this yellow out in the middle, you see how that is shifting so you just, take that out, there we go, cool, and the reason why i'm going a little, bit into the white, is because when you put a color on a, white surface that color is going to be, brighter even though it's the same, amount of yellow when i paint it on the, white that yellow shows up when i paint, the yellow on the brown it kind of shows, up you know what i mean so i'm letting, these strong colors, overlap onto the white, so then our viewer can see oh that, yellow oh that orange, nice even though they don't know that, they're actually seeing it you know what, i'm saying, yes i do know what you mean by seeing a, color but not seeing a color yeah, cause that happens all the time, plot twist this whole thing is green, okay, now i'm gonna do kind of where the, blue the wick meets the blue so i have a, little bit of my cyan here, you just need a little you don't need a, lot, i'm going to mix that with my white, and just right at the base can they see, that close up, so i put in my blue and then i'm going, to go for just straight cyan right at, this, so even with my cyan, there's a dark and then a light blue, and then it's gonna transition to the, yellow, and when you overlap it there's gonna be, a little bit of a green but that's okay, because that's what happens when you mix, flame, the blue and the yellow together you get, green, but, yeah, flame, and this seems like such a small thing, but when you do these kind of just, warm edges warm highlighted edges, that really, communicates so much to our viewer, that's what makes this feel warm, okay, okay, all right let's go back to the overhead, yeah look at that lit up i'm going to do, actually a little bit of red, right at the right at the tip, right around that kind of yellow orange, yeah there we go okay, i'm going to put in my wick and my wick, is just black, i'm not, trying to be too, difficult here, and then now i'm going to go in on my, edge and try and kind of straighten that, up, on my candle, so i'm trying to mix, like a cream colored so i have white i, have a little bit of brown i have yellow, i feel like the back part of this needs, to be bigger, hmm, no that's not it, we're going to let that dry, and then i'm going to actually take some, of that out what i'm going to do instead, is i'm going to use my white, and i'm going to do a highlighted front, edge, so i kind of blended out my edge at this, point on my painting, and i want to kind of like sharpen that, front a bit and what i'm going to do, before i do that, is i'm going to do a darker value on, this back, part of the candle to push it back into, space so what's happening here is i'm, trying to create a lip and then the top, like back part of the candle but it is, the values are competing in a way where, it's not convincing that it's two, different, planes does that make sense so i need to, push this, the like top part back, and then i need to highlight that edge, so then it's just like this is farther, away right underneath the flame and this, is what's facing us, so i'm actually going to make this a, darker value, back here, okay, and then i'm going to go with a white, and just kind of do a little, jacket, highlighted edge, now looking at that highlight if that's, too bright, you can just go in with a, slightly, little bit of color on it and tone that, white down, but we still want it to be, the, like, strongest like the highlightest, value on our candle, does that make sense yes, okay, and i don't want it to be perfectly, smooth so i'm kind of creating like a, little bit of a jagged line, and then you got to think about where, this edge kind of meets the back kind of, how it turns like edges around, okay, [Music], and then the back, i want to make a little bit more jacket, that feels better, cool, and then i think like that back edge, needs a little bit of a highlight i did, a good job pushing it back but now it, kind of has faded, so i just need to be like nope there's, still something back here it's not, competing with our foreground but, there's still something there, so i need to do just a little bit of a, light value, i'm still using my two just for this, detail work, okay that feels better i still think, that white is a little bit too bright, so i'm just going to do another layer on, top to try and tone it down, and i want to call attention to one, thing which is these concepts that i'm, talking about in terms of how values are, relating to each other and how that's, affecting our candle and how it that, changes the shape and all these are, not beginner concepts i just want to, acknowledge that so if you are, struggling and you're just like i can't, even see, what it is that you're trying to say, um, it's not you, this just takes a little bit of time to, pay attention to, those small shifts, but my goal by doing this is you'll just, start to pay attention to them because, that's like the trickiest part, is just, acknowledge like recognizing that, they're there, just looking at them, so even if you might not get what it is, that i'm saying, i hope that you can at least kind of, follow along, with the marks, and see how it's kind of shifting the, shape of the candle with every slight, change, and the more you follow along, more likely it is you'll see those, changes, okay, i'm gonna let that be, now, we are kind of like nearing the end, which is now this is where we're gonna, start doing our, bokeh, so for the boca part sorry i saw a, little highlight on that candle that was, trying to be nuts okay for the boca part, what i'm trying to communicate here is, like far away candle or maybe there's, like flames in the distance just a, little bit of movement, if you wanted to keep this static where, it's just a single candle what you would, do is you would just blend this black, and brown to a smooth transition and, that's it and then it would be a single, candle in a lit up room i mean in a dark, room, you just transition that out for us what, we're going to try and do is we're going, to mix a bunch of different browns and, create, overlapping circles to give the hint, that there is illumination coming from, other sources, so you can just use all the different, colors that are already there, and just try and get a bunch of, different browns going on, okay, and then what i'm going to do before i, start that is i'm going to transition, the black, up a little bit more on my flame so you, see if you look at the reference photo, the like reddish brown mark starts kind, of up here where on my painting it goes, out even with the candle so i'm going to, just move, this up, that's convenient yeah, yes it is, okay so basically we're just trying to, blend this, in a little bit, and we're going to be covering up a lot, of these spaces, there we go that feels that feels better, now i'm going to take my six, and i'm just going to start putting in, different size circles, using different shades or, different browns, and i'm going to let these circles kind, of overlap each other too, and i want you to notice that some of, these browns are really dark so they, barely stand out, and some of them are really more vibrant, if you want the vibrant ones don't add, white do orange so if you want let me, show you, if i were to take this brown and just, add yellow to it, this is the color i would get, or just add white to it that feels, disjointed from our painting connected, at all, whereas if i take just yellow and, magenta to make a an orange or a red i'm, going to do more orange, and i paint that here, it stands out more it's brighter, but it's not disjointed from our, painting, yeah so you see that you see how it, feels brighter but it isn't like, aggressive aggressive it isn't, indifferent it still feels like it's in, the same world right the other thing, that you can do to kind of make the, bokeh look more realistic is when you, overlap them, the area in which the circles overlap, will be a little bit brighter, think of it like when you do a light, yellow over a light yellow that are, transparent where they both overlap that, yellow is stronger, that makes sense you see what i'm saying, yes okay, cool cool cool, now i gotta cover up that like random, but i can with gouache which is why it's, fun gouache, i'm going to make that a little bit, bigger, and the other and so i'm trying to, create a movement that it's going this, way across but if you want it just kind, of, i felt like it was important to have a, movement so then it like maybe there are, i i don't know blowing i just kind of, traveling candles yeah i wanted it to, feel like the, bokeh had a shape, instead of it just being kind of like, floating dots you know what i'm saying, yes, so i kind of start over here and then as, i kind of like, move away my browns get a little bit, darker, so i'm just creating circles, and this is why we want different, dark browns and light browns, i need to do more orange, now you want to make sure that you're, happy with your background color before, you do your bokeh, so if you see some areas where you're, like actually that's not as smooth as i, want or i want to do one more layer you, want to address that before you do your, bokeh, it's starting to look really cool, already, and you can see i don't really have a, lot of rhyme or reason besides i'm, trying to create an angle here, that's it that's, that's my right one reason, so then you could, did you choose that direction, based on your flame or just the, direction you see in your head just the, direction i saw in my head because in, order for me to get this i looked at a, photo of a candle like in a black room, and then i also looked at different, pictures of candles with bokeh, and so there was one where it was kind, of like angled like up and i was just, like oh that's really pretty okay i'm, gonna combine these two, things, so they're kind of independent from each, other but not so much that, i, i wanted it to still feel like they were, in the same world, and then if you paint let's say you, paint a bokeh circle and it's so bright, that it actually is affecting, the composition to the point where it's, like drawing your eye like this circle, is doing right here, you can just go over it with the darker, value, and cover it, up gouache, gouache that's cool, gouache that's cool, and some of these circles like this i, think is the trickiest part with bokeh, you do not want it to distract from your, painting you want it to complement your, painting so i have, these bokeh elements but, if you do them in too light of a value, where it feels like it's, competing with your, subject then you need to darken them you, need to lower those values so it's not, like taking over everything, and try and have them relate to this, like highlighted brown that we have with, our candle, so some of these that we're doing out, here are barely there, and that's what we want, we want these to be subtle, so, okay, okay so i've done quite a few different, circles and now i'm going to look at, where some of them overlap and do a, little bit of that kind of like, overlap highlight, that, one here, it doesn't have to be a lot just like a, little, shift, okay i feel like something needs to, overlap here, there we go, okay, so we're still just kind of putting in, our different bokeh circles using, different browns oranges, just kind of taking time to step back as, well and saying is this competing, is this drawing my eye to a place where, i do not want the viewer's eye to go and, if you want the viewer's eye to go there, then like by all means do it you know, oh you know send them over there send, them over there with a ticket, for awe in amazement, okay that feels pretty good, oh i like that did you put more red in, there, yeah i like those ones this is just like, magenta, and i feel like it needs one here, and then the nice thing about gouache, you can take some out, so let's just say oh i don't really like, how that one looked, or any of them so i'm just going to take, that out yeah that's sweet yeah if, you're just like this actually isn't, doing what i want it to do, take it out my friend, and then i'm going to just kind of, tighten in the flame on this area again, there we go, maybe a little bit, here okay, yeah, and then, okay i'm going to leave the bokeh alone, for a second and i'm going to go back to, my flame, and i feel like this flame feels um, wispier, is that fair yeah that's fair so you can, change the wispiness of your, um, flame all you have to do is you, basically just thin it out, so i'm bringing in my flame, using a similar color to what i used as, my, like brown reddish highlight around it, and we're still going to do we'll do the, highlight again, after we bring it in, okay, so i'm going to make this go up a little, bit more using just a tiny bit of white, really thin strokes, and then just using straight, yellow along, the edge, i feel like it kind of goes, and let's round out that bottom to make, a more teardrop shape, using white, feels better, okay that feels better, then let's do this kind of highlight on, the edge of my candle stick, there we go, and these are just small, changes, small little changes, feels better, i think my black, wick needs to go deeper there we, go and what i did too just for that, little extra, flair of like brightness is i did little, yellow kind of dots, around some of these bokeh areas, just to kind of add to that feeling of, like, warmth and sparks and you know like, just, a little hint, and you can also use this yellow to do, some of the bokeh overlaps, but remember don't do anything like this, might be too big, that little yellow what do you think, should i leave it, do you like it i mean i've seen sparks, that big all right let's leave it, and there could be some areas where, you're like oh i didn't even see that, overlap okay let's, put that in, and if the yellow overlap is too strong, try orange, there we go, i'm going to try our chair, there we go, i think we're just about done, i just want to shape this a little bit, more bring that in, yeah there we go that feels wispier to, me, you're doing it guys you're doing great, so you're doing so well you're doing so, well look how far you've come already, look it, look how cool look at how cool our, candle is how wispy, there we go, there we go, there's that little highlighted edge, nice, that we needed, and just, one, more, hint of dark brown white right in the, wick like right where that, inside here, i don't know why i just feel like it, needs it, okay, yep yep yep, yep, i'm just kind of checking things now, i'm thinking does this feel convincing, does this feel convincing what about, this edge do i need to do another black, sometimes you won't know until you walk, away, and let it totally dry, okay, i feel convinced, that this, is a candle in a dark room lit up with, other things going on lights or bokehs, i think we're done nice, ah okay should we do the reveal yes, always all right, does gouache dry faster it does, that's nice too wash dry is pretty fast, i i'm, almost certain it dries faster than, acrylic, look at that edge, so, wow, oh my gosh this is one of those that, when you take the tape off you're like, holy crap yep i can beat this i just, painted that, too good, there we go, there is our candle you guys nice oh, okay i hope you guys, had fun with it i hope you learned a lot, i hope that you were patient and kind to, yourself because this was one where we, really kind of zeroed in on the smallest, changes and hopefully by doing that you, guys could see how little shifts can, really affect your work in a positive, way, i hope that you take this idea of, illumination and light and, black dark rooms and run with it see, what else you can make by learning these, concepts of you know just doing little, highlights here and wherever that light, is illuminating the space it's going to, be a lighter value and shifting your, values by hues by colors instead of just, adding water so take, this play with it run with it, have fun with it and share what you make, we want to see it if you are on facebook, you can join our watercolor group that's, called let's make our watercolor if, you're on instagram you can tag us at, let's go make art we love to see what it, is that you're making we love that you, take time to paint with us we love that, you prioritize your creativity you guys, are the best, we'll see you guys next week bye
Reddit Images 26

Candle Coloring Pages | How to Draw and Color a Candle | Easy Drawing 0

Learn Colors for Kids - Learn Colors Rainbow Ice Cream Round Cake with Candles Coloring Pages 1

Not my fanciest cake, but my nieces always have specific requests. For her 8th birthday, she requested this cake by sending me a coloring page, with the exact colors she wanted. I made all but the “red flames” on the candles happen. 2
Just finished another page of the coloring book. Page 6… I believe 3
![[RF] For u/AkuuDeGrace, Father Wick - Candle Wax (Plasmoid) - Light Domain Cleric: Heals the good with his warm light, and burns away the darkness. (color sketch)](https://i.redd.it/p4kg2qxyfhv91.jpg)
[RF] For u/AkuuDeGrace, Father Wick - Candle Wax (Plasmoid) - Light Domain Cleric: Heals the good with his warm light, and burns away the darkness. (color sketch) 4
page coloring for ch 171. 5

Konomi coloring by @Shazayumart (chapter 93 cover page) 6

Spring Day Flowers! Working to add more color to my candles without coloring the wax. 7
![[No Spoilers] Digitally colored the cover page (not the actual cover of the book itself) of the Life Is Strange coloring book](https://i.redd.it/cdncsa6chuu91.jpg)
[No Spoilers] Digitally colored the cover page (not the actual cover of the book itself) of the Life Is Strange coloring book 8
![[Other] who is this villain on my son’s coloring page? It’s driving me nuts!](https://i.redd.it/ihia4i1szvi91.jpg)
[Other] who is this villain on my son’s coloring page? It’s driving me nuts! 9
Randomly coloring one page of my coloring book 10

First page of the coloring book done! Any thoughts? 11

Accidentally spilled black candle wax on my Book of Shadows moon phases page. 🤦♂️ But, I guess it kind of looks interesting…? Right? 😬 12
{Artwork} Finally finished working on the coloring of this mask-less Spider-Gwen. It's about 98% pencils, with 2% of it in gel pen. It's a page from Marvel's WOMEN OF POWER coloring book, w/original art by Emanuela Lupacchino from Spider-Gwen Vol 2 #6 (Cover B Variant). 13

Santa candle on life inside the page 14
,


Comments
Post a Comment